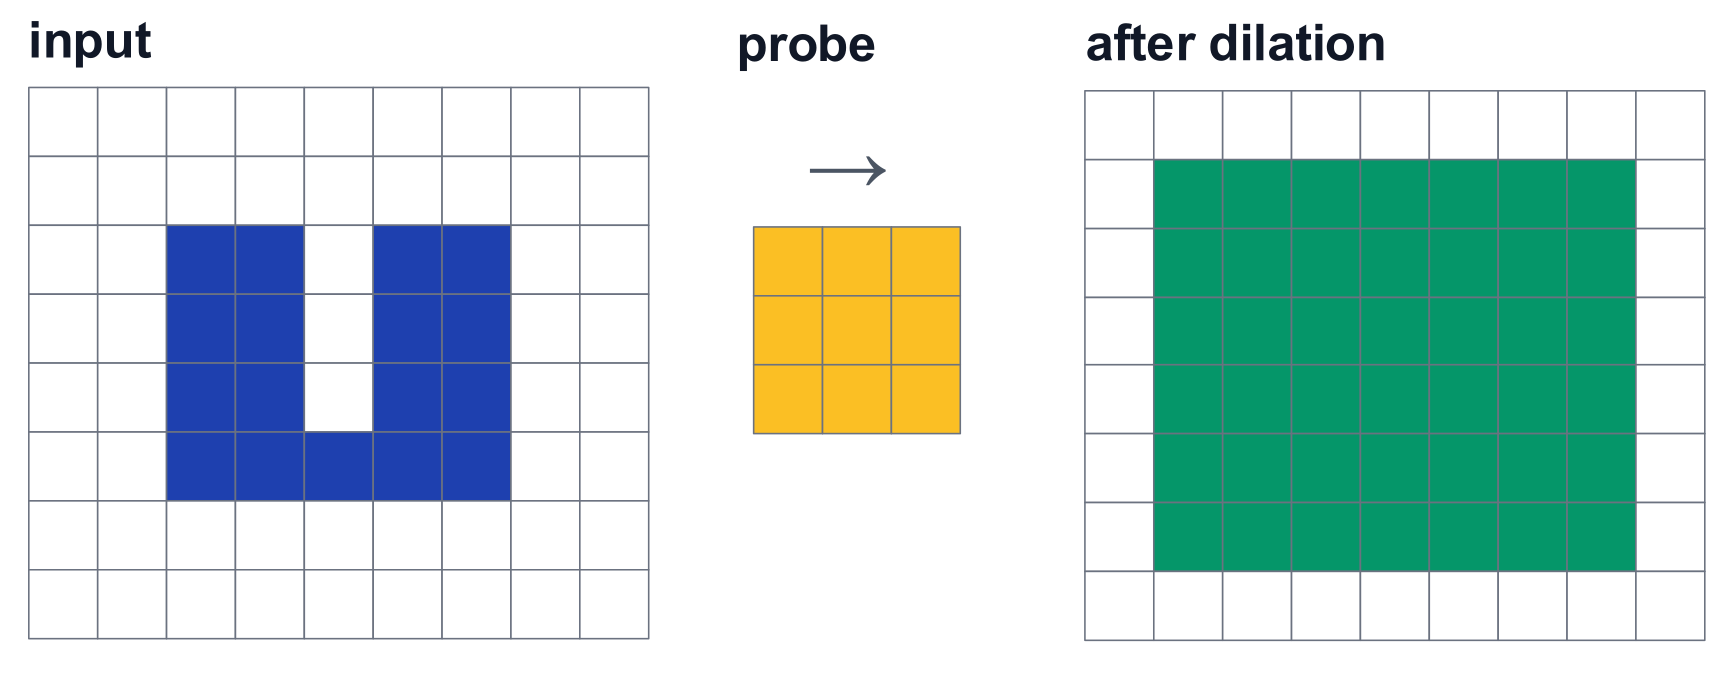
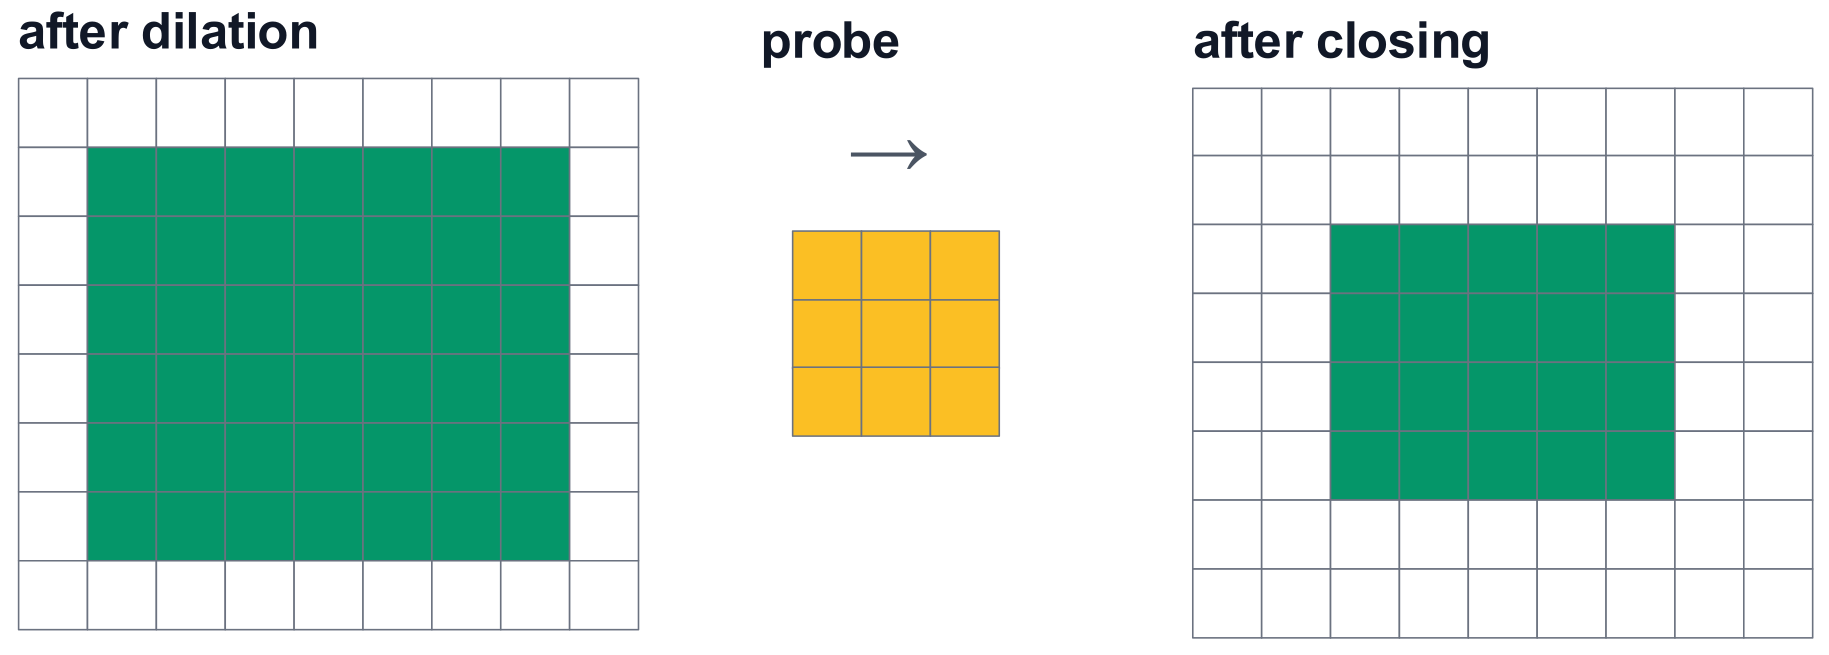
Closing fills small holes and narrow gaps in the foreground of a binary mask. It applies Dilation first, then Erosion, using the same structuring element, also called a probe, for both steps.
Dilation expands the foreground into nearby background pixels, including holes and gaps. It also expands the outside boundary. Erosion then removes much of this outer growth, while filled regions with enough foreground around them remain filled.
Main idea
Fill small breaks first, then shrink the outside boundary back. The erosion step uses the dilation result as its input.
Place the probe's anchor on each foreground pixel. Mark every position covered by its active cells as foreground in the dilation output.
After dilation:
Foreground expands into small holes
Nearby fragments can join across narrow gaps
The outside boundary also grows
Step 2: Erode the Dilation Result
At each position, check whether all active probe cells cover foreground in the dilated mask. Keep the output pixel at the anchor only when this condition is satisfied.
After erosion:
Much of the extra outer boundary is removed
Filled holes and gaps remain filled where the probe fits completely
The outer shape returns close to its original size
Use the dilation result
Finish dilation first, then erode that result. Eroding the original mask would shrink the foreground around its existing holes and gaps.
Worked Example: Fill a Small Hole
The input is a 3-by-3 foreground square with one background pixel at its centre. Use a centred 3-by-3 square probe, with all nine cells active.
Here, 1 means foreground and 0 means background. Treat positions outside the shown grid as 0.
Dilation: The centre hole fills, and the outer square grows from 3-by-3 to 5-by-5
Erosion: The outer boundary shrinks back to 3-by-3
Final result: The square keeps its original outer size, and the centre is now foreground
Why does erosion keep the filled hole?
Erosion checks the current dilated mask. At the centre, the entire 3-by-3 probe covers foreground, so the centre stays 1. At the outer edge, part of the probe reaches background, so that edge is removed.
Dilation connects the two fragments. Erosion returns the outer ends to their original positions. The central gap remains filled because its left, centre, and right positions are now foreground.
Understanding the Equation
X∙B=(X⊕B)⊖B
Meaning of each symbol:
Symbol
Meaning
X
Original foreground region
B
Structuring element used in both steps
∙
Closing
⊕
Dilation
⊖
Erosion
Evaluate the brackets first: dilate X with B, then erode that result with B.
Use closing for missing foreground, such as a break in a stroke. Use opening for extra foreground, such as an isolated speckle.
Choosing the Probe
Match the probe to the gap's direction and size:
A horizontal line connects short breaks along a horizontal structure
A vertical line connects short breaks along a vertical structure
A square fills small gaps in several directions and includes diagonal positions
A disk gives an approximately circular neighbourhood and can suit curved shapes
What does a disk probe look like?
A disk is a filled circular shape, approximated on a pixel grid. Here is one digital disk with radius 3, using distance from the centre to select active pixels:
The middle 1 is the anchor. Every 1 is active, including the centre. The 0 cells are outside the disk. A radius-1 digital disk can have the same pattern as a 3-by-3 cross. Scikit-image defines a disk by distance from its centre.
Uses and Limits
Typical uses:
Fill small holes inside object masks
Reconnect broken text strokes or road markings
Repair short breaks in detected structures
Nearby objects can merge
A probe that reaches across a wanted separation can join separate objects or strokes. Large probes can also fill meaningful holes and change boundary detail.
The gap must be compatible with the probe's shape and size. A filled position remains foreground only if it passes the erosion step.
For reliable results, use the same probe and anchor in both steps. Keep each step's input fixed while calculating its output.
Image boundary treatment
At the image edge, allow enough extra background around the input to hold the dilation growth. Perform both steps before cropping back to the original grid. Cropping away intermediate growth can cause erosion to remove wanted edge pixels.